全方位拥抱 DeepSeek【上集】老章用极简洁的方式介绍了将 DeepSeek 能力获取方式,以及如何将 DeepSeek 融入到写作、编程、翻译、总结等各场景。
本文再补充几个:
- DeepSeek + JupyterHub 辅助编程
- DeepSeek + openwebui 聊天助手
- DeepSeek + 知识库&Agent
前文阅读不错,500+ 转发都没换来腾讯的推荐,本文就算为上文讨杯 coffee 喝吧。
DeepSeek + JupyterHub 辅助编程
Jupyter AI 是一个扩展包,旨在将人工智能工具和功能集成到 Jupyter Notebook 环境中。通过 Jupyter AI,用户可以在 Jupyter Notebook 中直接使用各种 AI 服务和模型,如自然语言处理、机器学习和深度学习等,从而简化数据科学和机器学习项目的开发流程。
安装一定要完全安装:
pip install jupyter-ai[all]
不然大概率会出现以下报错:
There seems to be a problem with the Chat backend, please look at the JupyterLab server logs or contact your administrator to correct this problem.

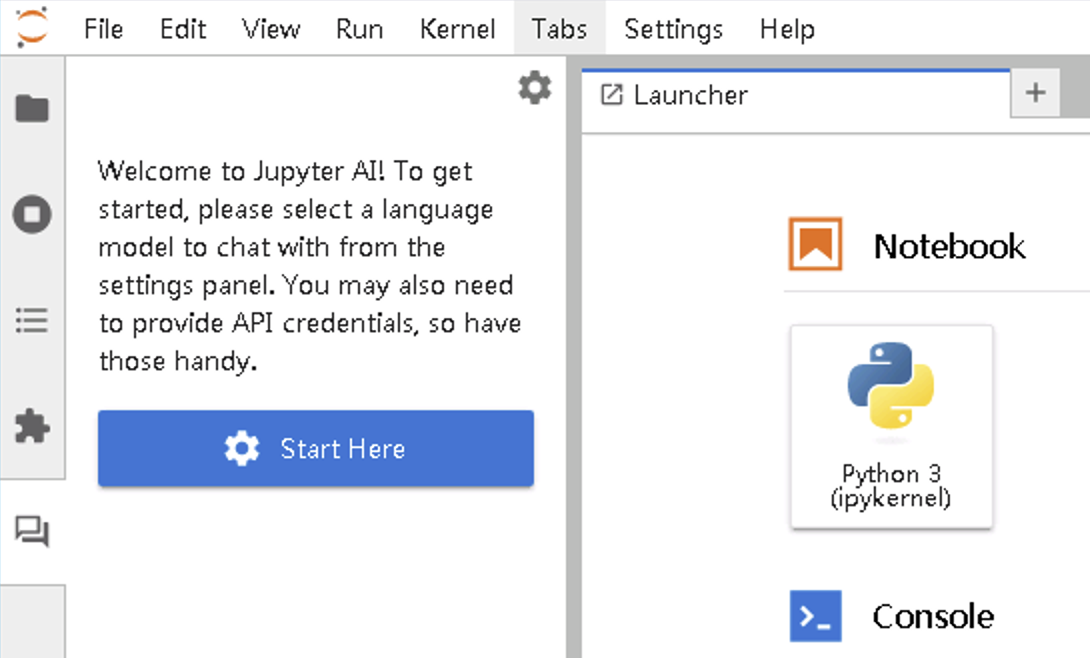
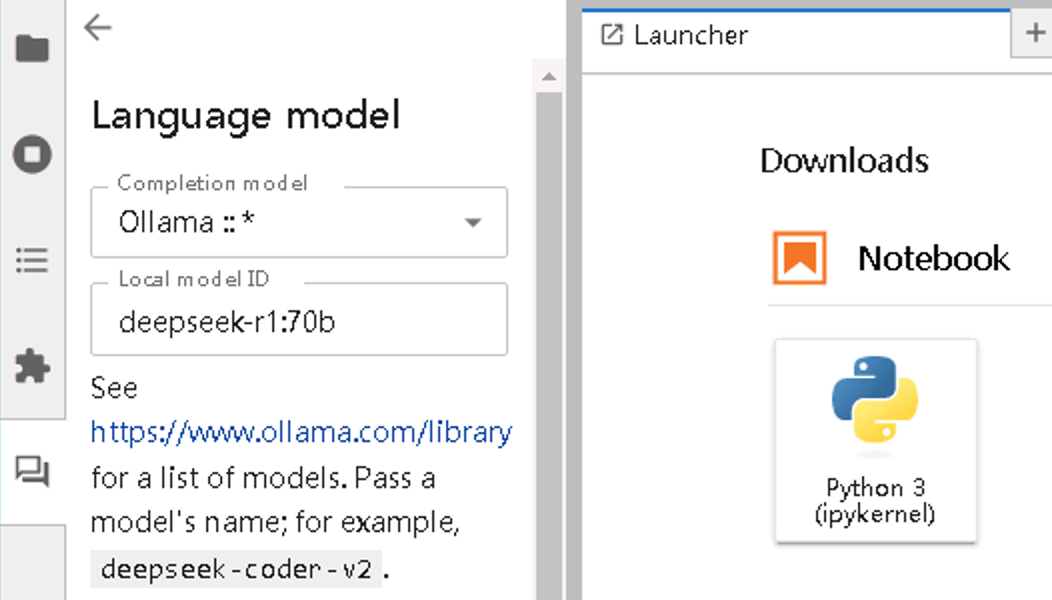
正常情况下,安装完成后的 juputerhub 是这样,点击右上角小齿轮就可以配置模型了
DeepSeek + openwebui 聊天助手
OpenWebUI 旨在为 AI 和 LLMs 构建最佳用户界面,为那些互联网访问受限的人提供利用 AI 技术的机会。OpenWebUI 通过 Web 界面本地运行 LLMs,使 AI 和 LLMs 更安全、更私密。
安装 openwebui 是我见过所有 chatbot 中最简单的了
1
2
3
4
5
# 安装
pip install open-webui

# 启动
open-webui serve
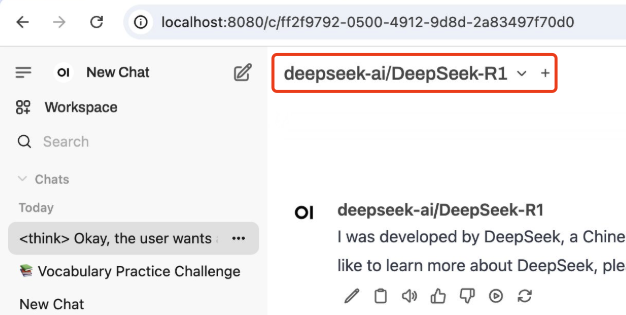
然后浏览器打开 http://localhost:8080
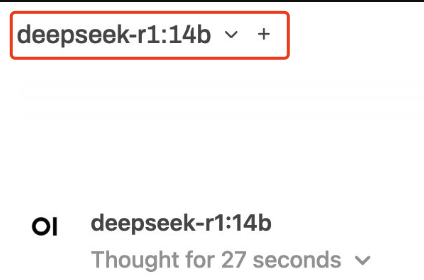
加号这里填入 ollama 拉起的模型名称即可
也可以配置 siliconflow 的模型
DeepSeek + 知识库&Agent
克隆 Dify 源代码至本地环境。
1
git clone https://github.com/langgenius/dify.git
启动 Dify
- 进入 Dify 源代码的 Docker 目录
1
 cd dify/docker
- 复制环境配置文件
1
 cp .env.example .env
-
启动 Docker 容器
根据你系统上的 Docker Compose 版本,选择合适的命令来启动容器。你可以通过
$ docker compose version命令检查版本:- 如果版本是 Docker Compose V2,使用以下命令:
1
 docker compose up -d
- 如果版本是 Docker Compose V1,使用以下命令:
1
 docker-compose up -d
- 如果版本是 Docker Compose V2,使用以下命令:
运行命令后,你应该会看到类似以下的输出,显示所有容器的状态和端口映射:
1
2
3
4
5
6
7
8
9
10
11
12
[+] Running 11/11
 ✔ Network docker_ssrf_proxy_network  Created                                                                 0.1s
 ✔ Network docker_default             Created                                                                 0.0s
 ✔ Container docker-redis-1           Started                                                                 2.4s
 ✔ Container docker-ssrf_proxy-1      Started                                                                 2.8s
 ✔ Container docker-sandbox-1         Started                                                                 2.7s
 ✔ Container docker-web-1             Started                                                                 2.7s
 ✔ Container docker-weaviate-1        Started                                                                 2.4s
 ✔ Container docker-db-1              Started                                                                 2.7s
 ✔ Container docker-api-1             Started                                                                 6.5s
 ✔ Container docker-worker-1          Started                                                                 6.4s
 ✔ Container docker-nginx-1           Started                                                                 7.1s
最后检查是否所有容器都正常运行:
1
docker compose ps
在这个输出中,你应该可以看到包括 3 个业务服务 api / worker / web,以及 6 个基础组件 weaviate / db / redis / nginx / ssrf_proxy / sandbox 。
1
2
3
4
5
6
7
8
9
10
NAME                  IMAGE                              COMMAND                   SERVICE      CREATED              STATUS                        PORTS
docker-api-1          langgenius/dify-api:0.6.13         "/bin/bash /entrypoi…"   api          About a minute ago   Up About a minute             5001/tcp
docker-db-1           postgres:15-alpine                 "docker-entrypoint.s…"   db           About a minute ago   Up About a minute (healthy)   5432/tcp
docker-nginx-1        nginx:latest                       "sh -c 'cp /docker-e…"   nginx        About a minute ago   Up About a minute             0.0.0.0:80->80/tcp, :::80->80/tcp, 0.0.0.0:443->443/tcp, :::443->443/tcp
docker-redis-1        redis:6-alpine                     "docker-entrypoint.s…"   redis        About a minute ago   Up About a minute (healthy)   6379/tcp
docker-sandbox-1      langgenius/dify-sandbox:0.2.1      "/main"                   sandbox      About a minute ago   Up About a minute
docker-ssrf_proxy-1   ubuntu/squid:latest                "sh -c 'cp /docker-e…"   ssrf_proxy   About a minute ago   Up About a minute             3128/tcp
docker-weaviate-1     semitechnologies/weaviate:1.19.0   "/bin/weaviate --hos…"   weaviate     About a minute ago   Up About a minute
docker-web-1          langgenius/dify-web:0.6.13         "/bin/sh ./entrypoin…"   web          About a minute ago   Up About a minute             3000/tcp
docker-worker-1       langgenius/dify-api:0.6.13         "/bin/bash /entrypoi…"   worker       About a minute ago   Up About a minute             5001/tcp
通过这些步骤,你应该可以成功在本地安装 Dify。
在 Dify 中接入 Ollama
在 设置 > 模型供应商 > Ollama 中填入:

-
模型名称:
deepseek-r1:7b -
基础 URL:
http://<your-ollama-endpoint-domain>:11434
使用 Ollama 模型

进入需要配置的 App 提示词编排页面,选择 Ollama 供应商下的 llava 模型,配置模型参数后即可使用。