| 大家好,在[100天搞定机器学习 | Day63 彻底掌握 LightGBM](https://mp.weixin.qq.com/s?__biz=MzA4MjYwMTc5Nw==&mid=2648959975&idx=1&sn=de750b7d2d4c68e2e912dbc131c5195e&chksm=879479cdb0e3f0db52c674044d4cee28d525d370284bf99d327ddb64228701965418abfc073e&token=1463794175&lang=en_US#rd)一文中,我介绍了LightGBM 的模型原理和一个极简实例。最近我发现Huggingface与Streamlit好像更配,所以就开发了一个简易的 LightGBM 可视化调参的小工具,旨在让大家可以更深入地理解 LightGBM。 |
网址:
https://huggingface.co/spaces/beihai/LightGBM-parameter-tuning
我只随便放了几个参数,调整这些参数可以实时看到模型评估指标的变化。代码我也放到文章中了,大家有好的优化思路可以留言。下面就详细介绍一下实现过程:
LightGBM 的参数
在完成模型构建之后,必须对模型的效果进行评估,根据评估结果来继续调整模型的参数、特征或者算法,以达到满意的结果。
LightGBM,有核心参数,学习控制参数,IO参数,目标参数,度量参数,网络参数,GPU参数,模型参数,这里我常修改的便是核心参数,学习控制参数,度量参数等。
| Control Parameters | 含义 | 用法 |
|---|---|---|
| max_depth | 树的最大深度 | 当模型过拟合时,可以考虑首先降低 max_depth |
| min_data_in_leaf | 叶子可能具有的最小记录数 | 默认20,过拟合时用 |
| feature_fraction | 例如 为0.8时,意味着在每次迭代中随机选择80%的参数来建树 | boosting 为 random forest 时用 |
| bagging_fraction | 每次迭代时用的数据比例 | 用于加快训练速度和减小过拟合 |
| early_stopping_round | 如果一次验证数据的一个度量在最近的early_stopping_round 回合中没有提高,模型将停止训练 | 加速分析,减少过多迭代 |
| lambda | 指定正则化 | 0~1 |
| min_gain_to_split | 描述分裂的最小 gain | 控制树的有用的分裂 |
| max_cat_group | 在 group 边界上找到分割点 | 当类别数量很多时,找分割点很容易过拟合时 |
| CoreParameters | 含义 | 用法 |
|---|---|---|
| Task | 数据的用途 | 选择 train 或者 predict |
| application | 模型的用途 | 选择 regression: 回归时,binary: 二分类时,multiclass: 多分类时 |
| boosting | 要用的算法 | gbdt, rf: random forest, dart: Dropouts meet Multiple Additive Regression Trees, goss: Gradient-based One-Side Sampling |
| num_boost_round | 迭代次数 | 通常 100+ |
| learning_rate | 如果一次验证数据的一个度量在最近的 early_stopping_round 回合中没有提高,模型将停止训练 | 常用 0.1, 0.001, 0.003… |
| num_leaves | 默认 31 | |
| device | cpu 或者 gpu | |
| metric | mae: mean absolute error , mse: mean squared error , binary_logloss: loss for binary classification , multi_logloss: loss for multi classification |
| Faster Speed | better accuracy | over-fitting |
|---|---|---|
| 将 max_bin 设置小一些 | 用较大的 max_bin | max_bin 小一些 |
| num_leaves 大一些 | num_leaves 小一些 | |
| 用 feature_fraction 来做 sub-sampling | 用 feature_fraction | |
| 用 bagging_fraction 和 bagging_freq | 设定 bagging_fraction 和 bagging_freq | |
| training data 多一些 | training data 多一些 | |
| 用 save_binary 来加速数据加载 | 直接用 categorical feature | 用 gmin_data_in_leaf 和 min_sum_hessian_in_leaf |
| 用 parallel learning | 用 dart | 用 lambda_l1, lambda_l2 ,min_gain_to_split 做正则化 |
| num_iterations 大一些,learning_rate 小一些 | 用 max_depth 控制树的深度 |
模型评估指标
以分类模型为例,常见的模型评估指标有一下几种:
混淆矩阵
混淆矩阵是能够比较全面的反映模型的性能,从混淆矩阵能够衍生出很多的指标来。
ROC曲线
ROC曲线,全称The Receiver Operating Characteristic Curve,译为受试者操作特性曲线。这是一条以不同阈值 下的假正率FPR为横坐标,不同阈值下的召回率Recall为纵坐标的曲线。让我们衡量模型在尽量捕捉少数类的时候,误伤多数类的情况如何变化的。
AUC
AUC(Area Under the ROC Curve)指标是在二分类问题中,模型评估阶段常被用作最重要的评估指标来衡量模型的稳定性。ROC曲线下的面积称为AUC面积,AUC面积越大说明ROC曲线越靠近左上角,模型越优;
Streamlit 实现
Streamlit我就不再多做介绍了,老读者应该都特别熟悉了。就再列一下之前开发的几个小东西:
核心代码如下,完整代码我放到Github,欢迎大家给个Star
https://github.com/tjxj/visual-parameter-tuning-with-streamlit
1
2
3
4
5
6
7
8
9
10
11
12
13
14
15
16
17
18
19
20
21
22
23
24
25
26
27
28
29
30
31
32
33
34
35
36
37
38
39
40
41
42
43
44
45
46
from definitions import *

st.set_option('deprecation.showPyplotGlobalUse', False)
st.sidebar.subheader("请选择模型参数:sunglasses:")

# 加载数据
breast_cancer = load_breast_cancer()
data = breast_cancer.data
target = breast_cancer.target

# 划分训练数据和测试数据
X_train, X_test, y_train, y_test = train_test_split(data, target, test_size=0.2)

# 转换为Dataset数据格式
lgb_train = lgb.Dataset(X_train, y_train)
lgb_eval = lgb.Dataset(X_test, y_test, reference=lgb_train)

# 模型训练
params = {'num_leaves': num_leaves, 'max_depth': max_depth,
            'min_data_in_leaf': min_data_in_leaf,
            'feature_fraction': feature_fraction,
            'min_data_per_group': min_data_per_group,
            'max_cat_threshold': max_cat_threshold,
            'learning_rate':learning_rate,'num_leaves':num_leaves,
            'max_bin':max_bin,'num_iterations':num_iterations
            }

gbm = lgb.train(params, lgb_train, num_boost_round=2000, valid_sets=lgb_eval, early_stopping_rounds=500)
lgb_eval = lgb.Dataset(X_test, y_test, reference=lgb_train)
probs = gbm.predict(X_test, num_iteration=gbm.best_iteration)  # 输出的是概率结果

fpr, tpr, thresholds = roc_curve(y_test, probs)
st.write('------------------------------------')
st.write('Confusion Matrix:')
st.write(confusion_matrix(y_test, np.where(probs > 0.5, 1, 0)))

st.write('------------------------------------')
st.write('Classification Report:')
report = classification_report(y_test, np.where(probs > 0.5, 1, 0), output_dict=True)
report_matrix = pd.DataFrame(report).transpose()
st.dataframe(report_matrix)

st.write('------------------------------------')
st.write('ROC:')

plot_roc(fpr, tpr)
上传Huggingface
Huggingface 前一篇文章(腾讯的这个算法,我搬到了网上,随便玩!)我已经介绍过了,这里就顺便再讲一下步骤吧。
step1:注册Huggingface账号
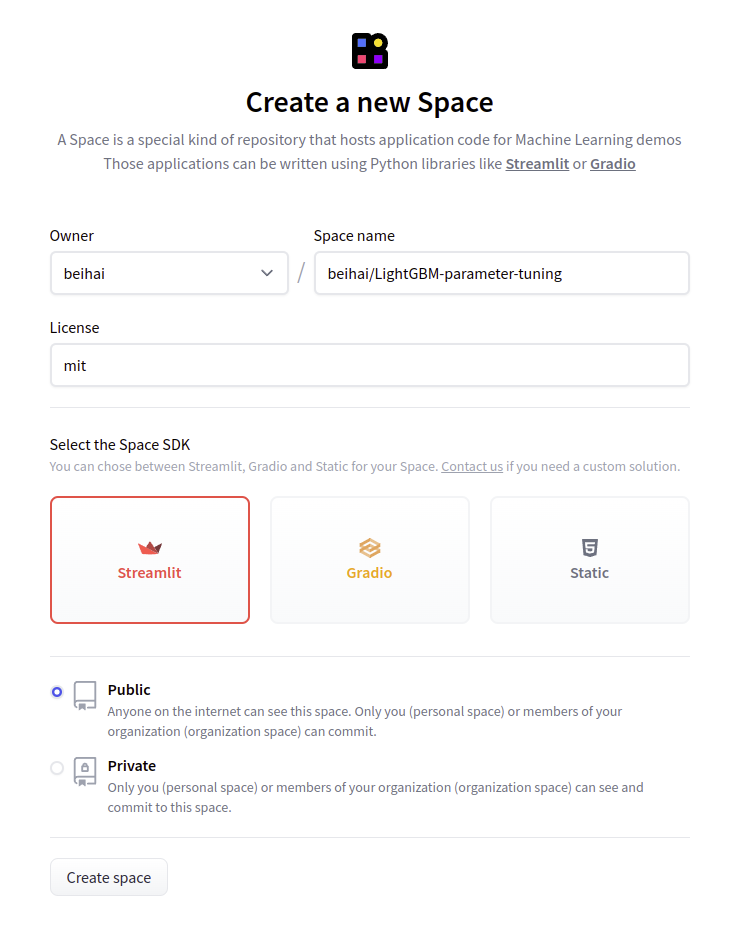
step2:创建Space,SDK记得选择Streamlit

step3:克隆新建的space代码,然后将改好的代码push上去
1
2
3
4
git lfs install
git add .
git commit -m "commit from $beihai"
git push
push的时候会让输入用户名(就是你的注册邮箱)和密码,解决git总输入用户名和密码的问题:git config --global credential.helper store
push完成就大功告成了,回到你的space页对应项目,就可以看到效果了。

